Materials & Applications
Embroidered Hem Borders: Repeat Placement and Joins Around a Long Hem
Use the fabric’s embroidered edge when your cutting layout can place it on the finished hem. Choose a separate sew-on trim when the garment panels need a different cutting direction or the decoration sits above the edge. Mark the full hem, the first complete motif, each panel seam and the final join. Check the joins on an assembled sample before confirming the length to order.
Embroidered long-hem borders: Define the route of the finished border
Start with the actual garment pattern and mark the intended visible hem line, panel seams, openings and any train. Decide whether the border follows the finished edge, sits above it or is attached as a separate strip. Those choices change the relevant placement line. Do not substitute a raw cutting edge or a rough skirt circumference for that agreed route.
Record how the material is supplied: a border running along a fabric edge, a separate trim length or a panel with a fixed decorative layout. A metre of base fabric and a metre of usable border are not automatically the same ordering unit. Confirm the usable decorative length and any constraints before estimating quantities with the garment team.
Choose between an embroidered fabric edge and an applied trim
Use the fabric’s own embroidered edge when the actual pattern can place the finished hem on that edge and the grain, repeat and usable width still work. Mark the cut edge and the visible line separately, and test the finish on a spare section before committing the full layout. A decorative edge may still need support or finishing.
Use a separately applied trim when the garment panels need a different cutting direction or the decoration must sit away from the cut edge. Confirm the attachment line on the sample, including the reverse and any lining. Compare one seam or opening in each trial and record which materials are ordered by length.
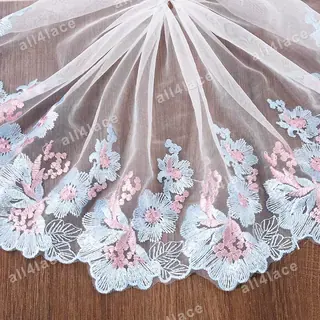
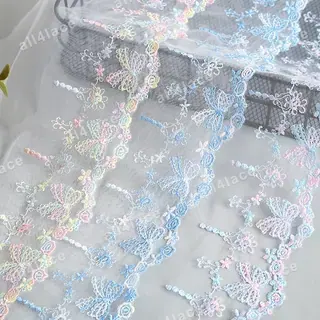
The rose-motif tulle trim shown below is a separate length. On the pattern, mark the last complete rose before the opening and the first complete rose after it. Pin the actual trim along the visible hem line and check both ends before you approve the join. If the embroidery must be part of the fabric edge, request a full-width image showing where that border sits.
Sources & further reading
Place the repeat on the complete hem map
Choose a visible starting landmark, such as a complete flower at centre front. Place the actual repeat along the full route on the pattern layout, then examine what happens at each seam. A join that looks good at one side may leave an incomplete motif at the back. Moving the starting point can change several junctions at once.
Keep the repeat reference, motif direction and intended alignment point together. Do not assume two borders can be mirrored or reversed just because their edge shapes look similar. Check the actual face and pattern arrangement. If precise matching requires extra length, calculate it from the approved layout instead of adding an unverified universal waste percentage.
Sources & further reading
Give each junction its own instruction
A single instruction to “match the border” is rarely enough for a hem with several panels or an opening. Mark whether the priority is a full motif, continuous stem, level decorative edge or intentional interruption at each location. These priorities can conflict, so review the visible outcome rather than promising all of them everywhere.
| Location | Possible visual priority | Record on the layout |
|---|---|---|
| Centre front | A complete focal motif | Starting landmark |
| Panel seam | Chosen stem or motif connection | Alignment point on both pieces |
| Opening or slit | A deliberate end to the decoration | Left/right end positions |
| Back join | An agreed interruption or continuation | Closed-junction sample view |
Review curved hems in their hanging shape
A straight border and a curved garment hem are different shapes. Lay the proposed border along the actual pattern route and ask the garment team how the construction will accommodate that relationship. Review the planned method on a representative assembly before accepting it. Do not assume a strip will follow any curve by stretching, easing or pressing without changing its appearance.
Hang the sample in the intended garment form and inspect the front, sides and back. Check the lower edge, the join to the garment and any visible inner layer. For a train or slit, review those sections separately. Photograph the complete view and close views of marked junctions; a neat close-up alone does not show whether the border hangs consistently around the whole hem.
Sources & further reading
Approve a complete route, not just a swatch
Consider a hypothetical long skirt with a centred front flower and a discreet back join. The first layout preserves the front flower but leaves half a motif on both sides of the back seam. The team could compare shifting the start point with placing an intentional break at the back. The choice belongs in the marked layout and sewn sample, not in a vague request for a seamless look. This is an illustrative scenario, not an All4Lace customer case.
Retain the pattern version, full border route, repeat reference, junction map, assembly photographs and supply unit in one approval record. Separate visual approval from any unresolved care, attachment or production assessment. A change to skirt panels, size range or border repeat should trigger a new layout review, because the previously approved front view does not establish the result around a revised hem.
Discuss your embroidery project
Send All4Lace the complete hem route, panel and opening positions, preferred border reference and priority motifs. Ask for the supply unit and repeat information needed for your layout, then have your garment team confirm the proposed joins on an assembled sample.
Contact Zhijin