Materials & Applications
8 Types of Fashion Embroidery: Techniques, Textures and Uses
A smooth stitched flower, a raised cord outline and a sparkling sequin panel can all be described as embroidery, yet they create different surfaces. For clothing development, start with the effect you want and the place it will sit. This guide compares eight techniques used across the All4Lace range and explains what to look for when choosing a sample.
Separate technique, material and format
Technique describes how the decoration is made. Material identifies the thread, cord, tape, sequin or bead. Format tells you whether you are ordering a continuous trim, a shaped appliqué, a garment panel or fabric by length. These descriptions overlap: a polyester trim may combine cord and sequin embroidery, while two similar-looking flowers may use very different constructions.
| Technique | Main surface effect |
|---|---|
| Flat embroidery | Thread lines and filled areas |
| Cord embroidery | Raised cord outlines |
| Tape embroidery | Wider lines and folds |
| Sequin embroidery | Reflective discs and coverage |
| Bead and pearl embroidery | Raised points and detailed motifs |
| Chenille and towel-effect embroidery | Looped or piled texture |
| 3D embroidery | Raised petals or layered elements |
| Mixed embroidery | Several materials in one motif |
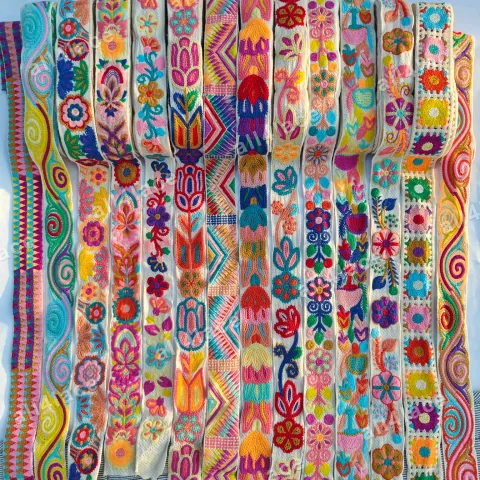
1. Flat embroidery: stitched lines and filled areas
Flat embroidery forms the design with thread stitched into a ground fabric. Stitch direction can give a petal a sheen or make a border look more defined. It is useful for repeated motifs, clothing trims and shoe-upper decoration. On a sample, inspect the outline, filled areas and reverse side, then bend the fabric to see whether the decoration suits the intended garment.
2. Cord embroidery: raised outlines and curves
Cord embroidery secures a cord along a planned path, producing a raised line. Changing the cord thickness and spacing changes the character of the motif. Crochet-look borders and flowing ornamental shapes are possible applications. Check tight curves and joins on the physical sample: a neat front does not show how much space the attachment needs on the reverse.
Sources & further reading
3. Tape embroidery: broader lines and folded texture
Tape embroidery uses a narrow tape or ribbon as a decorative element. Its flatter width can create broader lines than a round cord, while turns and folds introduce texture. Compare the tape edges, turning points and joins. A colour match alone is not enough when substituting tape: width, surface finish and behaviour around curves also affect the result.
Sources & further reading
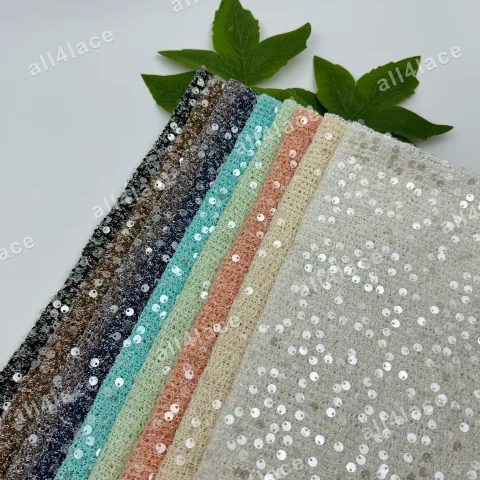
4. Sequin embroidery: reflected light and surface coverage
Sequins are attached to the ground to create scattered highlights, outlines or dense areas. Disc size, finish, spacing and overlap all change the appearance. A clear sequin over coloured lining can look different from the same sample over white. View it under the intended light, and check the attachment, cutting direction and areas that will meet seams.
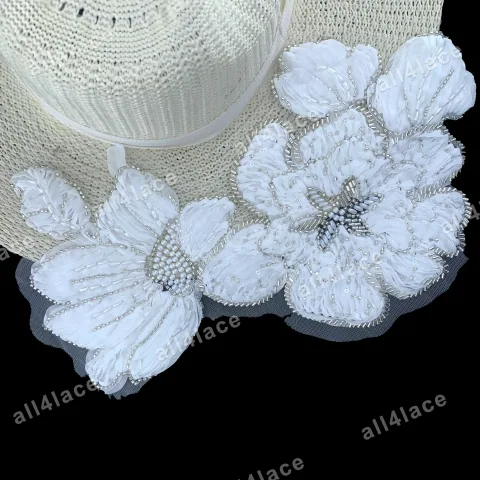
5. Bead and pearl embroidery: dimension and focal detail
Beads, bugles and pearl-like elements add dimension and small highlights. They may define a neckline, emphasise a flower or cover a larger panel. The name does not establish the bead material or whether every step is handmade. Ask for the material and attachment method, then assess weight, exposed edges and contact with the wearer on the intended placement.
Sources & further reading
6. Chenille and towel-effect embroidery: a piled surface
Looped embroidery creates a textured surface that reads differently from flat thread fill. Chenille and towel-effect are useful descriptive starting points, but a similar fuzzy appearance can come from different constructions. Inspect the pile, outline and backing. For garment trims, also see how the piece bends and how the edge can be sewn without crushing the surface.
Sources & further reading
7. 3D embroidery: raised motifs and layered elements
3D embroidery is a description of dimension, not a single manufacturing method. Raised petals, layered motifs and padded areas can produce different effects. Confirm which parts are raised and how they are supported. A sample should show the height and flexibility of the decoration where it will sit, especially near a neckline, sleeve opening or overlapping garment panel.
8. Mixed embroidery: combining materials in one design
A mixed design may combine stitched thread, cord, sequins and beads. This can create a distinctive surface, but the order and spacing of the elements matter. Review the whole motif rather than approving each material separately. Check joins, areas where elements touch and the space left for cutting or sewing, then keep the approved combination as the reference.
Choose by garment placement, then compare samples
A border needs a usable sewing edge; a neckline motif needs the right outline; a larger fabric panel needs a suitable repeat and decorated width. Once you choose the format, compare two or three techniques on the same lining or garment reference. Include the ground and stabilising materials in the review because they affect the finished embroidery as well as its appearance.
For example, when choosing a finish for a cuff, place a cord embroidery sample and a sequin embroidery sample on the intended lining. Mark the joining seam, then check how the cord outline will meet at the join and where the sequins will sit relative to the stitching line.
- A photo or sketch showing the intended position
- Finished dimensions and whether the unit is a piece, pair or length
- Ground fabric, lining and the visible decoration
- Reference colour, quantity and target delivery date
Sources & further reading
Common questions about embroidery types
Is every openwork trim handmade? No. A hand-crochet appearance does not establish the manufacturing process. Ask how the reference is constructed. Is every raised motif padded embroidery? No. Layers, cords, beads and separate petals can also create height. Identify the construction before using the name in a specification.
Can techniques be combined? Yes, where the design, materials and production method allow it. Which type is best? The useful choice is the one that produces the intended surface and works with the garment. A stitched sample in the intended position is a better decision tool than the technique name alone.
Discuss your embroidery project
Send All4Lace a reference image, garment position and approximate dimensions. We can discuss suitable techniques and sample options using the closest references in our range.