Materials & Applications
Eyelet Embroidery and Broderie Anglaise: Holes, Ground and Borders
Eyelet embroidery creates decorative openings in a ground fabric and finishes their edges with stitching. Broderie anglaise is associated with this openwork tradition, often combining eyelets with surface embroidery. The practical identification question is simple: are the openings actual holes within a retained cloth, and how are their edges finished? A white floral embroidery, an open mesh and a photographed dot pattern should not be accepted as equivalent references without checking the material itself.
What makes an embroidered eyelet different?
The Textile Research Centre describes broderie anglaise as open whitework with eyelets in a fabric ground. This helps distinguish a hole within cloth from a gap between connected lace motifs or an opening already present in a mesh.
An eyelet in a sewing brief can also mean a small fastening hole or the metal ring that reinforces it. If the reference is unclear, ask for a front and reverse photo and specify whether the opening should be edged with thread for decoration or reinforced with a fitting for a cord.
Use the name to introduce the intended look, then state the ground, thread colour and opening arrangement separately. The name alone does not verify fibre content, production method, softness or suitability for the proposed garment. These remain questions for the selected reference.
Sources & further reading
Eyelet, cutwork and guipure-style lace
Cutwork covers embroidery traditions that create open areas in fabric. Broderie anglaise often combines stitched eyelets with surface stitching. In Richelieu work, stitched bars can cross larger openings where the ground cloth has been removed.
Inspect a complete repeat from both sides. Check where the ground cloth continues, how each opening is finished and what links the motifs. A bar across a single opening does not identify guipure or confirm the manufacturing method. Verify the construction before specifying trim or continuous fabric.
Sources & further reading
Inspect the edge of the opening, not just its outline
The Royal School of Needlework describes large eyelets formed by cutting fabric and securing the edges with stitches. That is a technical reference for understanding the opening, not a claim that a particular commercial sample was made by hand or uses the same procedure.
Inspect both faces under useful light. Look for the continuity of the stitching around the hole, any untrimmed material inside and distortion of the surrounding cloth. Ask whether an irregular opening is intentional in the approved design. A useful sample review distinguishes the intended shape from an execution issue.
Sources & further reading
Compare four references that can look similar online
Similar flowers in small online images can hide different structures. Compare what remains in and around the openings before deciding which material matches the brief. The table is an identification checklist; it does not assign quality grades.
| Reference | Look for | Do not infer |
|---|---|---|
| Eyelet embroidery | Stitched openings within retained cloth | Every floral stitched ring is open |
| Surface embroidery | Decoration on a ground that may remain intact | A white pattern necessarily has holes |
| Embroidered mesh | A continuous net between motifs | Net openings are cutwork eyelets |
| Connected openwork lace | Links between motifs | The same ground as eyelet cloth |
Choose allover cloth or a placed border deliberately
For an allover blouse fabric, show the full repeat and its relationship to the front opening, seams and darts. For a hem border, identify the decorated edge, the depth of the design and the sewing allowance above it. Do not treat border depth as the same measurement as total supplied width.
The schematic illustrates single and double border arrangements only. It does not depict eyelet stitches. If a scalloped edge is required, mark its peaks and valleys against the finished hem line. Check how the design continues across a side seam and whether the planned cutting direction preserves the intended orientation.
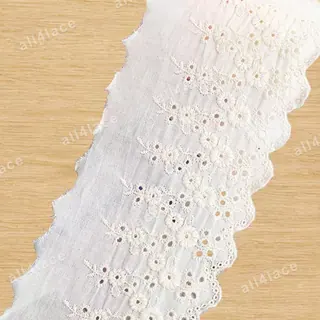
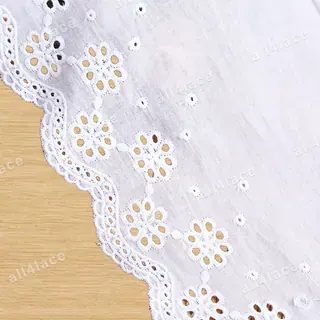
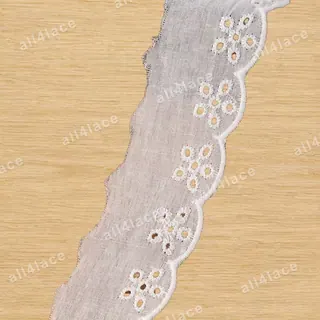
Use the three linked trim samples to compare a plain attachment margin, larger daisy openings and small repeating daisy openings. For a full-width cloth, ask for a flat sample across the repeat. Confirm the ground, finished width and sewing allowance on the selected reference.
Turn the visual reference into a usable sample brief
Consider a cuff with a row of openings: place the paper pattern over the sample and check whether the joining seam crosses an opening or solid cloth. Make the proposed seam in a small trial assembly and inspect the result from both faces. Decide lining or coverage from the garment requirement and actual combination, not from the word cotton or eyelet.
A useful brief might request a repeated row of oval openings below a cuff seam, with solid cloth reserved for that seam. Add the intended hole arrangement and border orientation to the drawing. When considering an alternative, compare those marked features first, then review washing and dimensional requirements under the planned care conditions. Keep any process requirement explicit in the request.
- State ground and embroidery composition separately.
- Record hole shape, spacing, repeat and border direction.
- Confirm usable width, border depth and sewing allowance independently.
- Approve both-face details, a seam trial and the intended lining combination.
Discuss your embroidery project
Send All4Lace your eyelet reference and garment sketch, identifying the openings and border placement you want, so we can discuss the construction questions and a suitable sample brief.
Contact Zhijin